Table of Contents
- Why Posing Matters in Professional Portraits
- Standard Standing Poses for Professional Portraits
- How to Look Natural in Professional Photos
- Sitting Down Portrait Techniques
- Hand Placement and Arm Positioning
- Corporate Headshot Posing Guide
- How Long Does a Professional Headshot Session Take
- Head, Shoulders, and Eye Contact: Building Confidence
Last Updated: August 20, 2026
Why Posing Matters in Professional Portraits
A confident pose is the difference between a headshot that lands auditions and one that sits unused. The way you hold your body, angle your shoulders, and position your hands communicates something before you ever speak. Professional portraits are your visual handshake, for actors seeking casting-ready images, entrepreneurs building personal brands, and corporate professionals establishing credibility on LinkedIn, posture and positioning determine whether you look approachable, authoritative, or uncomfortable.
At Neil Taylor Photography, we’ve worked with hundreds of professionals across London and Kent who initially felt awkward in front of the camera. What changed wasn’t their face or wardrobe, but understanding how to position themselves intentionally. A small adjustment to your shoulder angle, deliberate hand placement, or subtle head tilt transforms the entire impression. The good news: confident posing is learnable.
Standard Standing Poses for Professional Portraits
Standing poses form the foundation of professional portraiture. They’re versatile, flattering, and project confidence across industries.
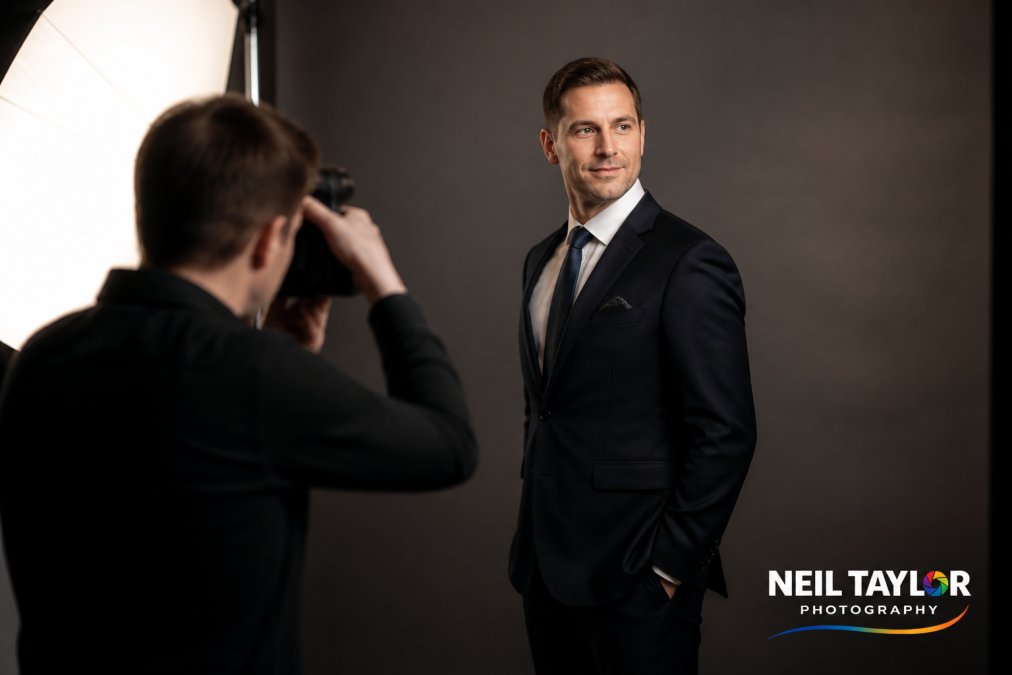
The Classic Angled Stance
Rather than standing square to the camera, angle your body roughly 45 degrees with one shoulder closer to the lens than the other. This immediately creates dimension and makes you appear slimmer and more dynamic.
Stand with feet shoulder-width apart, turn your body 45 degrees away from the camera, and keep your front foot forward with your back foot slightly behind. Your weight should rest evenly on both feet to prevent a locked, tense look. Drop your front shoulder slightly lower than your back shoulder, creating a natural slope that’s inherently flattering. Position the lens at eye level or slightly above to prevent unflattering shadows under the chin and keep your jawline defined.
For corporate headshots and LinkedIn profiles, the classic angled stance works across industries because it balances professionalism with approachability.
The Straight-On Power Pose
Face the camera directly with feet shoulder-width apart and weight evenly distributed. Keep your shoulders relaxed, tension reads immediately in the image. Your chin should be level with the ground, and tilt your head very slightly toward one shoulder. This tiny movement breaks symmetry and prevents a rigid, mugshot-like appearance.
The straight-on approach works best for executive portraits and situations where you need to communicate direct authority. It’s less forgiving than the angled stance, so every element needs to be intentional.
How to Look Natural in Professional Photos
Looking natural in professional portraits requires breaking symmetry. Shift your weight slightly to one leg, drop one shoulder a fraction lower than the other, and angle your body rather than facing the camera straight on. These small asymmetries signal that you’re a real person, not staged.
Your expression matters as much as your posture. Don’t think "I should smile", instead, recall a moment when someone said something clever or imagine a professional accomplishment. That recalled emotion creates a real expression. Look directly at the camera lens, not slightly above or to the side. Direct eye contact communicates confidence and engagement.
Breathing matters more than people realise. Hold your breath and your shoulders tense up. Take a slow breath just before the shot to relax your face and prevent that strained look.
Sitting Down Portrait Techniques
Sit forward on the chair rather than back into it. Sitting fully back creates slouch and compresses your torso. Perch on the front two-thirds of the seat to keep your posture upright and elongate your silhouette.
Book your headshot session today →
Angle your body slightly toward the camera at 30-45 degrees, similar to standing poses. One knee can be slightly higher than the other, creating a dynamic line through your body. Your arms need purpose: avoid crossed arms or letting them hang straight down. Instead, rest one forearm on your lap with the other hand relaxed, or rest both forearms on your thighs with hands relaxed.
For seated corporate headshots, keep your back straight but not rigid. Lean slightly forward to signal engagement and confidence, and keep your chin level or tilted very slightly down to prevent double-chin shadows.
Hand Placement and Arm Positioning
Hands should look purposeful, not ornamental. Avoid limp, dangling hands or hands shoved in pockets. For standing poses, place one hand on your hip or in your pocket with your thumb hooked out, creating a natural line and arm definition. Your other arm can hang naturally at your side or rest with your hand in your pocket.
When your arms are at your sides, create a small gap between your arm and your body. This creates visual separation and makes you look slimmer. Bend your elbows slightly, straight arms look stiff.
Arms Crossed Variations
Crossed arms can work in professional portraits if executed correctly. Cross them loosely with one arm higher than the other, rather than tightly across your chest. One hand can rest on the opposite arm, or both hands can rest on your upper arms. This projects calm authority rather than defensiveness.
For corporate portraits, shooting slightly from above prevents crossed arms from appearing too imposing. The angle softens the posture and makes it read as composed rather than closed off.
Corporate Headshot Posing Guide
For executives and C-suite professionals, the angled stance with a subtle power element works well. Stand at roughly 45 degrees with shoulders back and chin level. Your expression should communicate confidence and approachability.
For team photography and LinkedIn profiles, slightly softer posing often works better. The angled stance remains effective, but your expression should be warmer with a slight head tilt and genuine expression. Outfit choice influences posing decisions, structured blazers support more formal, authoritative posing, whilst softer fabrics pair better with warmer, more approachable positioning.
For in-office corporate portraits, position yourself at a slight angle to your environment rather than facing it straight on. This creates visual interest and shows you in context.
How Long Does a Professional Headshot Session Take
A basic individual headshot session typically takes 30-45 minutes, including setup, lighting adjustments, and capturing enough variations for genuine options. More comprehensive sessions with multiple outfit changes or different locations run 60-90 minutes.
The actual shooting time is shorter than the total session time. Most of that duration involves setup, lighting, reviewing shots, and direction. The camera actively captures for maybe 15-20 minutes, though it feels longer because you’re focused and engaged.
For corporate team photography, add 5-10 minutes per person for individual headshots, plus additional time for group shots. A team of eight people typically requires 90-120 minutes. Don’t choose the absolute shortest session available, a slightly longer session gives you better odds of capturing genuinely confident images.
Book your headshot session today →
Head, Shoulders, and Eye Contact: Building Confidence
Your head position, shoulder alignment, and eye contact form the confidence trifecta. These three elements work together to communicate competence and self-assurance.
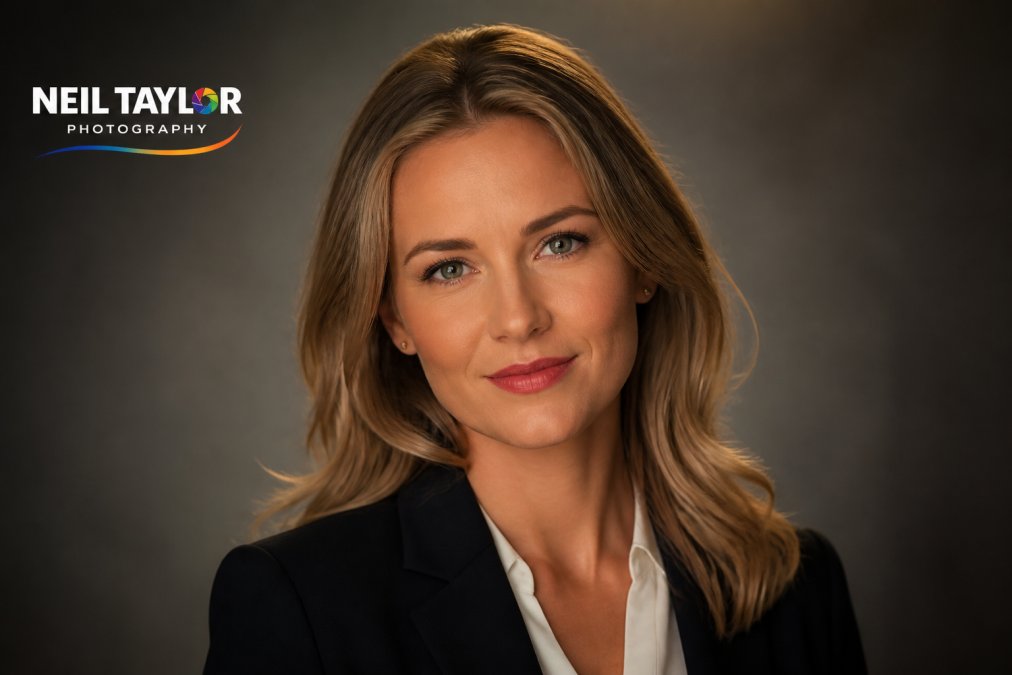
A slight head tilt, roughly 15-20 degrees toward one shoulder, creates a more approachable, engaged appearance. Avoid tilting your head up unless you’re specifically trying to elongate your neck, head tilt up can read as arrogant. Neutral or slightly down reads as engaged and confident.
Your shoulders communicate tension or relaxation instantly. Before the shot, consciously relax your shoulders by rolling them back and down. This opens your chest, improves your posture, and signals confidence.
Eye contact is non-negotiable. Look directly at the lens, not at the photographer’s face or camera body. This creates genuine connection with anyone viewing the image and communicates confidence, honesty, and engagement. If direct eye contact feels uncomfortable, practice beforehand by looking at your own eyes in a mirror and recalling a moment when you felt genuinely confident.
Getting professional portraits right requires understanding how your body communicates. The best poses for professional portraits aren’t about looking perfect, they’re about looking intentional, confident, and authentic.
Whether you’re an actor preparing casting submissions, an entrepreneur building your personal brand, or a corporate professional establishing credibility, posing strategy matters. Neil Taylor Photography specialises in capturing actors, entrepreneurs, and business professionals with the expertise to guide you through posing, ensure you look natural rather than stiff, and deliver images that genuinely represent your professional presence.
For questions or to discuss your specific needs: hello@neiltaylorphotography.com
Frequently Asked Questions
What are the best poses for professional photos?
The most effective professional portrait poses combine good posture, angled positioning, and natural body language. Standing at a 45-degree angle to the camera, keeping shoulders relaxed, and maintaining eye contact creates a confident appearance. Sitting poses work well when your torso is angled slightly forward and your hands are positioned purposefully. The key is avoiding stiff, rigid positioning, your pose should feel comfortable so your natural expression shines through.
How to look natural in professional photos?
Looking natural in professional photos starts before the session. Wear clothing that fits well and makes you feel confident. During the shoot, think about something positive rather than forcing a smile. Vary your poses slightly between shots to capture different angles and expressions. Take a moment between poses to relax your face and shoulders. A skilled photographer will guide you through small adjustments, a subtle chin projection, a slight head tilt, or weight shift, that make a significant difference in how natural and relaxed you appear.
How long does a professional headshot session take?
Most professional headshot sessions run between 30 minutes to an hour, depending on the package and number of outfit changes. This timeframe allows the photographer to capture multiple poses, angles, and expressions without rushing. The session includes setup time, posing guidance, and several outfit or background variations. Allowing adequate time ensures you feel comfortable, the photographer can direct you properly, and you'll have a strong selection of images to choose from for your LinkedIn profile or auditions.
How do I look more confident in professional headshots?
Confidence in headshots comes from proper posture, eye contact, and feeling prepared. Stand or sit with your shoulders back and your chin slightly projected, this creates a stronger silhouette and projects authority. Make direct eye contact with the camera as if speaking to someone you respect. Practice your expression beforehand so it feels natural rather than forced. Wear professional clothing that fits well and makes you feel capable. Remember that a good photographer will help you feel at ease, so communicate any concerns beforehand and trust their direction during the shoot.
This article was written using GrandRanker