
Table of Contents
- Why Looking Natural in Portraits Matters
- Posing for Photos Naturally: Foundation Techniques
- How to Relax for Photos: Mental Preparation and Comfort
- Flattering Camera Angles for Portraits: Finding Your Best Side
- Authentic Expressions Photography: Moving Beyond the Forced Smile
- Common Mistakes That Make Portraits Look Stiff
- Working with Your Photographer: Communication and Direction
- Styling and Wardrobe Choices for Natural-Looking Portraits
Last Updated: July 29, 2026
Why Looking Natural in Portraits Matters
The difference between a stiff photograph and one that captures who you are comes down to comfort, body language, and your relationship with your photographer. When you look natural in a portrait, it becomes a window into who you actually are, critical for actors, entrepreneurs, and business professionals being evaluated by casting directors or potential clients.
Most people feel uncomfortable in front of a camera and instinctively stiffen, force a smile, or hold their breath. These reactions are normal but undermine natural-looking portraits. The good news: looking relaxed and authentic in photos is entirely learnable. It requires intentional posing, breathing, and mental preparation, the posing just needs to be invisible.
The single biggest mistake people make is trying to “look natural” by doing nothing. Paradoxically, looking natural in portraits requires intentional posing, breathing, and mental preparation. The posing just needs to be invisible.
Posing for Photos Naturally: Foundation Techniques
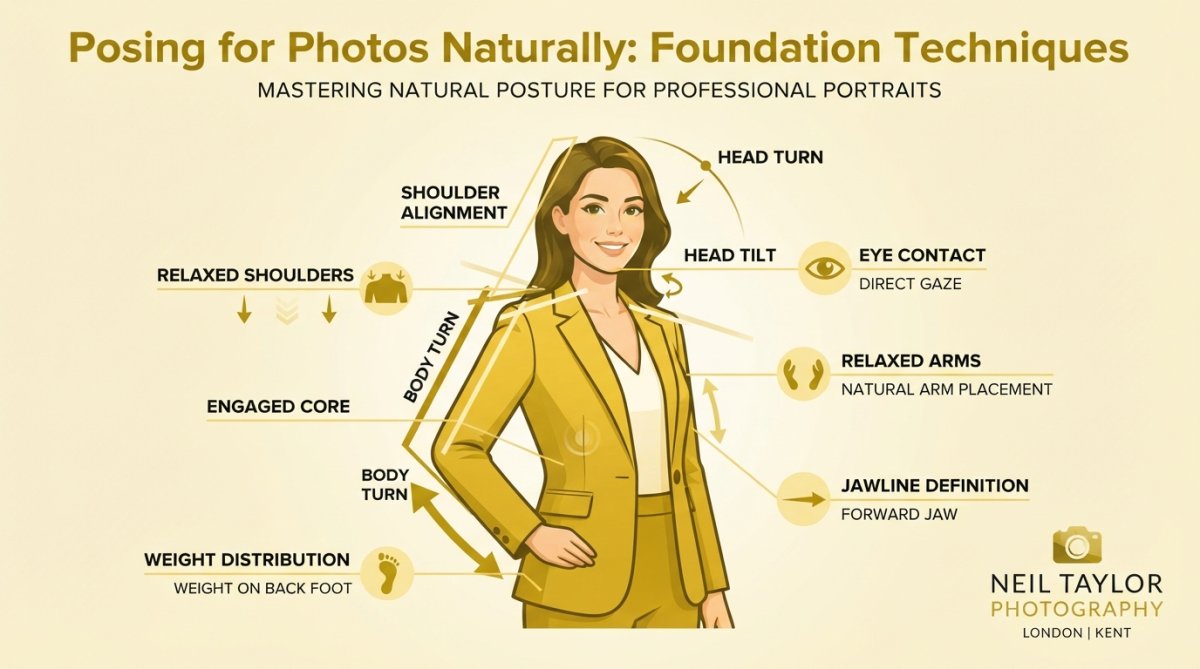
Good posing is about finding comfortable positions and making micro-adjustments that flatter your frame without looking staged. Your body should never be square to the camera, this flattens your frame and leaves your arms and hands nowhere natural to go.
Body angles and shoulder alignment
Your shoulders should be angled away from the camera at roughly 45 degrees. This narrows your frame, creates dynamic composition, and gives your arms space to rest naturally. Turn your body so your shoulders point slightly away from the camera, then turn your head back toward the lens for eye contact. This creates a gentle twist through your torso that looks engaged and natural. Rest your weight on your back foot with your front foot slightly forward.
A 45-degree angle is the sweet spot, more and you lose connection with the camera; less and you lose the flattering angle. Avoid hunching; consciously roll your shoulders back and down before shooting. This opens your chest, lengthens your neck, and immediately conveys confidence.
Chin projection and jawline definition
Slightly project your chin forward and down, not up. Moving your chin forward about an inch elongates your neck, defines your jawline, and prevents the double-chin effect. The adjustment should feel subtle. Practice in the mirror before your session so you can replicate it without thinking.
Side or three-quarter lighting naturally emphasizes your jawline. Ask your photographer to position light to one side for definition without harshness.
How to Relax for Photos: Mental Preparation and Comfort
Tension photographs. Start your session day well-rested, hydrated, and fed. Avoid excessive caffeine, which amplifies nervousness.
Breathing techniques and tension release
Your breathing controls your nervous system. Practice box breathing before shooting: breathe in for four counts, hold for four, exhale for four, hold for four. Repeat five times to activate your parasympathetic nervous system. During the shoot, breathe naturally, don’t hold your breath while the camera clicks.
Progressive muscle relaxation also helps: systematically tense and release different muscle groups before the session. Physical movement loosens you up, walk around rather than sitting in the waiting area.
Building trust with your photographer
Your relationship with your photographer directly impacts how natural you look. Spend the first few minutes talking to them. Ask about their process and see examples of relaxed, natural portraits. During the shoot, listen to direction but don’t overthink it, one or two small tweaks per shot is the maximum. Ask for feedback to build confidence that you’re moving in the right direction.
Flattering Camera Angles for Portraits: Finding Your Best Side
Spend time in the mirror before your session. Take photos of yourself from different angles to understand which angles feel most like you. This helps you guide your photographer toward angles where you feel confident.
A lens pointed slightly downward at your face is almost always more flattering than one pointed upward. Ask your photographer to shoot at eye level or slightly above. Three-quarter view is almost always more flattering than straight-on, adding dimension and preventing a flat appearance.
For headshots and close portraits, the photographer should be roughly 4-6 feet away, close enough to capture genuine expression but far enough to avoid distortion.
Authentic Expressions Photography: Moving Beyond the Forced Smile
A genuine smile involves your entire face: eyes crinkle at the corners, cheeks lift, mouth curves naturally. The difference between a real and forced smile is instantly visible.
Eye contact and natural facial expression
Your eyes are where viewers look first and determine trustworthiness and confidence. Make eye contact with the camera as if having a conversation, interested but not staring intensely.
Think of something that makes you genuinely happy just before the photographer shoots. This activates the muscles around your eyes and creates a natural smile. Avoid "say cheese", instead, practice a subtle smile in the mirror where teeth show slightly but your mouth feels relaxed.
Let your expression shift slightly between shots. If you hold the exact same expression for 20 shots, your face will look strained. Relax slightly between shots, then engage again when ready.
Interaction and movement during the shoot
Static poses feel stiff. Engage with your photographer through conversation and laughter, these moments create the most natural expressions. Photographers often capture shots while you’re talking or laughing because that’s when your face is most relaxed.
Subtle movement helps too: shift your weight slightly, adjust your posture, turn your head a few degrees. This prevents looking planted or rigid. Take breaks after 5-10 minutes of shooting to breathe, shake out your limbs, and reset.
The most natural-looking portraits happen when you’re engaged with your photographer rather than performing for the camera. Conversation, movement, and genuine interaction create images that feel alive and authentic.
Common Mistakes That Make Portraits Look Stiff
The most common mistake is holding your breath, tension spreads throughout your body, showing in your shoulders, face, and eyes. Breathe naturally throughout the shoot.
Avoid a hard stare at the camera; soften your gaze instead. Overposing is also common, if a pose doesn’t feel natural to your body, it will look forced. Work with your photographer to find comfortable poses.
Tension in your hands and arms creates visible stiffness. Let your arms bend slightly, put a hand in your pocket, or rest it on your leg. Wear clothes that fit well and allow comfortable movement, tight clothing creates visible tension.
Finally, don’t compare yourself to others’ photos. Focus on looking like the best version of yourself.
Working with Your Photographer: Communication and Direction
Communicate clearly before your session about what you need. During the session, listen to your photographer’s direction but speak up if something doesn’t feel right. A good photographer appreciates your input because it helps them get better shots.
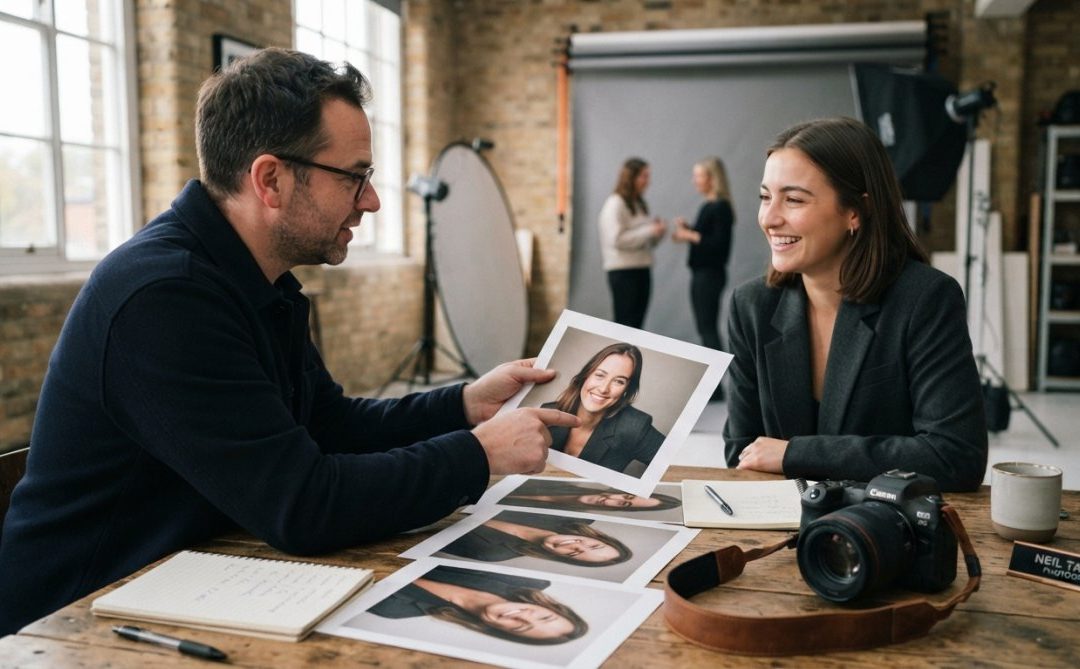
Ask your photographer to show you images on the back of the camera as you go. Real-time feedback helps you understand what’s working and adjust throughout the session. Don’t hesitate to ask for direction, a good photographer has clear answers and expertise to trust.
Styling and Wardrobe Choices for Natural-Looking Portraits
Solid colors photograph better than busy patterns. Jewel tones, neutrals, and pastels work well. Avoid pure white (glare) and pure black for close headshots (harsh shadows).
Fit matters enormously, clothes should skim your body without clinging or being oversized. Crew necks, v-necks, and scoop necks work well for headshots. Avoid busy accessories that distract from your face.
Your hair and makeup should feel like an enhanced version of your everyday self. If you don’t normally wear heavy makeup, don’t wear it for your session. Consider bringing multiple outfit options for different purposes.
| Wardrobe Element | Best Choices | Avoid |
|---|---|---|
| Colors | Jewel tones, neutrals, pastels | Pure white, pure black (for headshots), neon |
| Fit | Well-fitted, allows movement | Tight, oversized, restrictive |
| Necklines | Crew neck, v-neck, scoop neck | High necklines, very low necklines |
| Patterns | Solid colors | Busy patterns, stripes, small checks |
| Accessories | Minimal, simple | Distracting, multiple pieces, large jewelry |
| Makeup | Enhanced everyday look | Dramatic, unfamiliar, heavy |
Looking natural in portraits isn’t about being photogenic or having a perfect face. It’s about understanding how to position your body, manage tension, and connect authentically with your photographer. When you combine proper posing with genuine relaxation and intentional communication, you create images that feel like you, confident, approachable, and real.
At Neil Taylor Photography, we specialize in creating this experience for actors, entrepreneurs, and business professionals in London and Kent. We handle styling guidance, posing direction, and real-time feedback throughout your session so you can focus on being yourself. Actor headshot best practices guide emphasizes that the relationship between photographer and subject is the foundation of authentic-looking portraits. Book your headshot session today and get images that actually capture who you are.
Frequently Asked Questions
How do I stop looking stiff or uncomfortable when posing for portraits?
The key is movement and interaction rather than holding a static pose. Ask your photographer to direct you through subtle shifts, turning your shoulders slightly, adjusting your chin, or moving between poses rather than freezing in one position. Practice relaxation techniques like deep breathing before the shoot. Many camera-shy subjects find that candid shots taken during conversation feel more natural than posed moments. Trust your photographer's direction; they're trained to spot tension in your body language and will guide you toward more authentic expressions that feel comfortable.
What's the best camera angle for a flattering portrait?
The most flattering angle depends on your face shape, but generally a camera positioned slightly above eye level (by 10-15 degrees) tends to be universally flattering. This angle minimises jawline shadows and creates a subtle lift to facial features. However, the best approach is to work with your photographer to test angles during your session. Ask them to show you variations, slight profile angles, direct-to-camera, and three-quarter views, so you discover what feels most authentic to you. Avoid extreme angles unless you're going for a specific creative look. The angle that makes you feel most like yourself often photographs best.
How can I get a genuine smile instead of a forced one in my portrait?
Genuine smiles come from genuine emotion, not muscle memory. Instead of 'smile for the camera,' try thinking of something that makes you happy, or have your photographer engage you in conversation to capture candid moments. Many professionals use movement, ask you to laugh, walk toward the camera, or adjust your position, which creates natural facial expressions as a byproduct. Avoid holding a smile; instead, relax your face between shots and smile fresh for each frame. If smiling feels unnatural, authentic expressions without a smile (thoughtful, confident, engaged) often look more powerful in professional portraits, especially for business headshots and actor portfolios.
How do posing for photos naturally and authentic expressions work together in a professional session?
Posing and authentic expression are complementary. Good posing, proper shoulder alignment, flattering angles, chin projection, creates the technical foundation, while authentic expressions bring life and personality to that foundation. Start with basic posing techniques to feel grounded and comfortable, then focus on genuine interaction and movement. Your photographer should direct both simultaneously: 'Turn your shoulders slightly, now think about your next big project.' This combination ensures you look polished and natural at the same time. The goal isn't to look posed; it's to look like the best, most confident version of yourself.
This article was written using GrandRanker